Getting Started with EC2
Welcome, tech enthusiasts! Today, we’re diving into AWS EC2, the default compute service that provides access to virtual machines known as instances. Whether you’re new to cloud computing or looking to deepen your understanding, this guide has you covered.
Infrastructure as a Service (IaaS)
AWS EC2 is an example of Infrastructure as a Service (IaaS), where the unit of consumption is an instance. Here are some key points to understand:
- Instance Configuration: An EC2 instance is configured to launch into a single VPC subnet by default.
- Private Service: By default, it’s a private service, and public access must be configured.
- Networking: If you’re using a custom VPC, you’ll need to handle the networking yourself.
- Availability Zone (AZ): EC2 deploys into one AZ. If the AZ fails, the instance fails.
- On-Demand Billing: Instances come in different sizes and capabilities, all billed per second based on what you consume.
- Storage Options: You can use local on-host storage or Elastic Block Storage (EBS).
Pricing is based on:
CPUMemoryStorageNetworking
There are extra costs for any commercial software the instance deploys with.
Running State
When an EC2 instance is in the running state, it incurs charges for all four categories:
- CPU: Running on a physical host using CPU.
- Memory: Using memory even without processing.
- Disk Storage: OS and data are stored on disk, allocated to you.
- Networking: Always ready to transfer information.
Stopped State
When an EC2 instance is stopped, you’re only charged for EBS storage:
- No CPU resources are being consumed.
- No memory is being used.
- Networking is not running.
- Storage is still allocated to the instance for the OS and applications.
Terminated State
In the terminated state, there are no charges, as the disk is deleted and future charges are prevented.
Compute Resources and Associated Resources
Compute resources are directly related to processing power and memory usage, including CPU and memory. Associated resources are related to the instance but not directly tied to its computational processing, such as:
- Storage (EBS Volumes): Disk space for the OS, applications, and data.
- Elastic IP Addresses: Public IP addresses for internet communication.
- Elastic Network Interfaces (ENIs): Virtual network interfaces for connectivity.
Here’s a handy table summarizing charges by instance state:
| State | Compute Resources | Associated Resources | Charges |
|---|---|---|---|
| Running | CPU, Memory | Storage (EBS Volumes, EIPs, ENIs) | Compute usage, Storage usage, Data transfer |
| Stopped | None | Storage (EBS Volumes, EIPs, ENIs) | Storage usage (EBS Volumes), Elastic IP charges, Data transfer |
| Terminated | None | None | No charges |
Amazon Machine Image (AMI)
An AMI can be used to create an instance or created from an instance. Here are the components of an AMI:
- Permissions: Controls which accounts can use the AMI.
- Public: Anyone can launch it.
- Owner: Only the owner can use it to create instances.
- Explicit: Owner grants access to specific AWS accounts.
- Root Volume: Contains the Boot Volume (at least one volume).
- Block Device Mapping: Links the volumes to the OS, determining boot and data volumes.
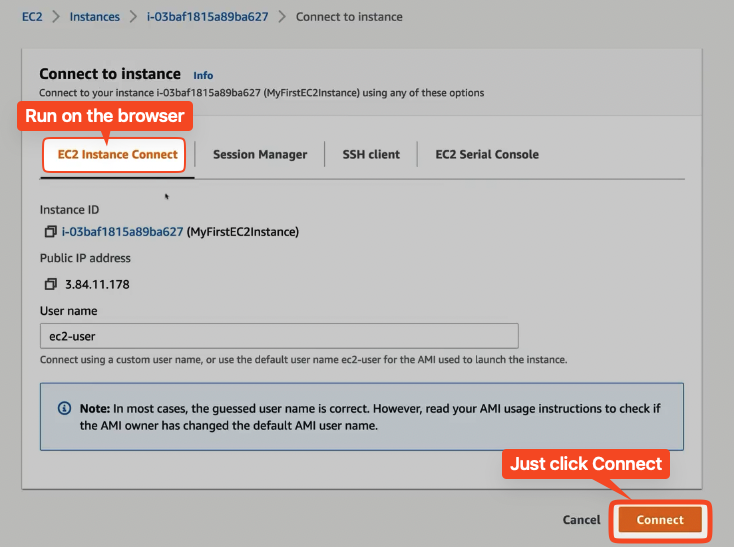
Connecting to EC2
There are different AMI types, including Amazon Quick Start AMIs, AWS Marketplace AMIs, Community AMIs, and Private AMIs. Here’s how you connect to EC2 instances:
- Windows: Use RDP (Remote Desktop Protocol) on port 3389.
- Linux: Use SSH protocol on port 22.
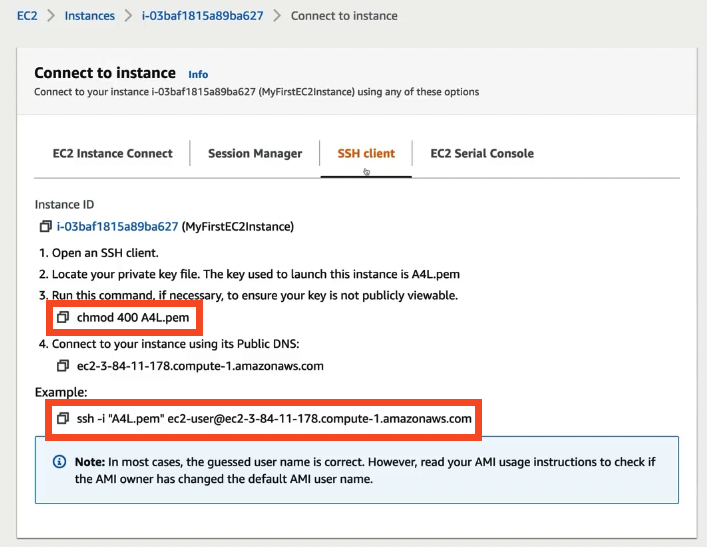
To authenticate, you’ll need an SSH key pair:
- Private Key: Stored on your local machine to initiate the connection.
- Public Key: AWS places this key on the instance.
If the private and public parts match, you’re authenticated.
| Aspect | Linux EC2 Instances | Windows EC2 Instances |
|---|---|---|
| Protocol | SSH (Secure Shell) | RDP (Remote Desktop Protocol) |
| Interface | Command-line interface | Graphical user interface (GUI) |
| Authentication | SSH key pairs | Username/password authentication |
| Client Tools | OpenSSH, PuTTY | Remote Desktop Client, third-party RDP clients |
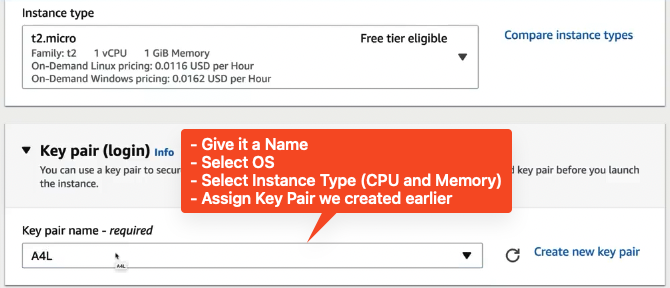
Demo: Setting Up an EC2 Instance
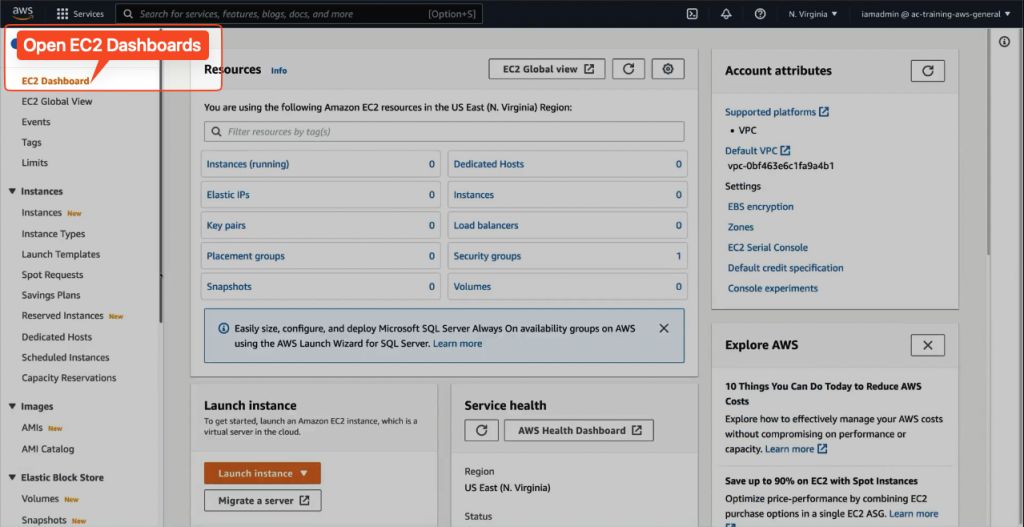
Step 1: Open EC2 Dashboard
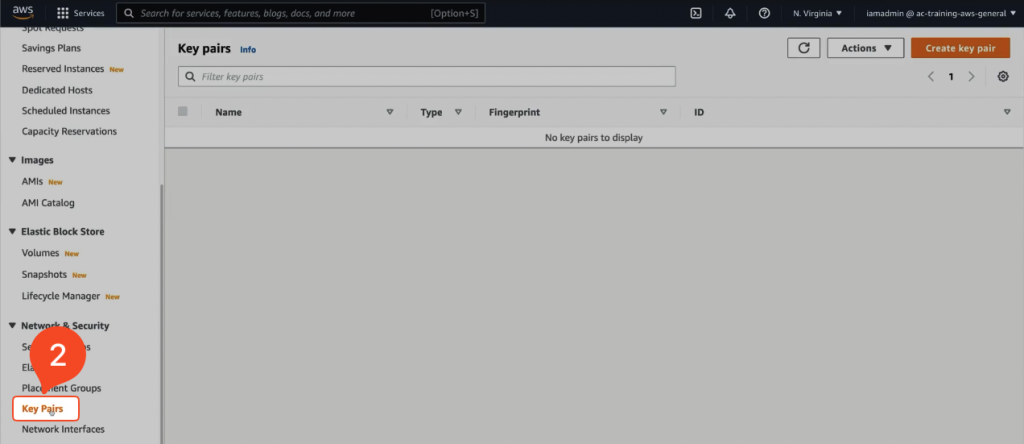
Step 2: Navigate to Network & Security → Key Pairs
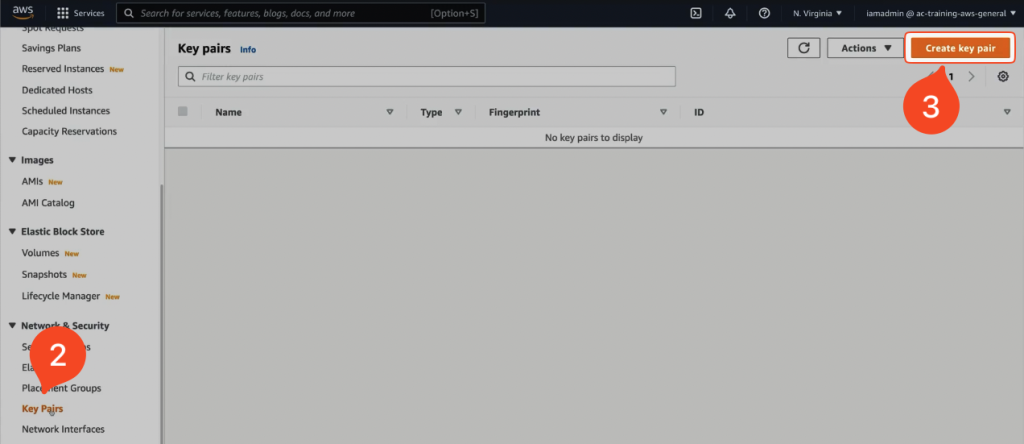
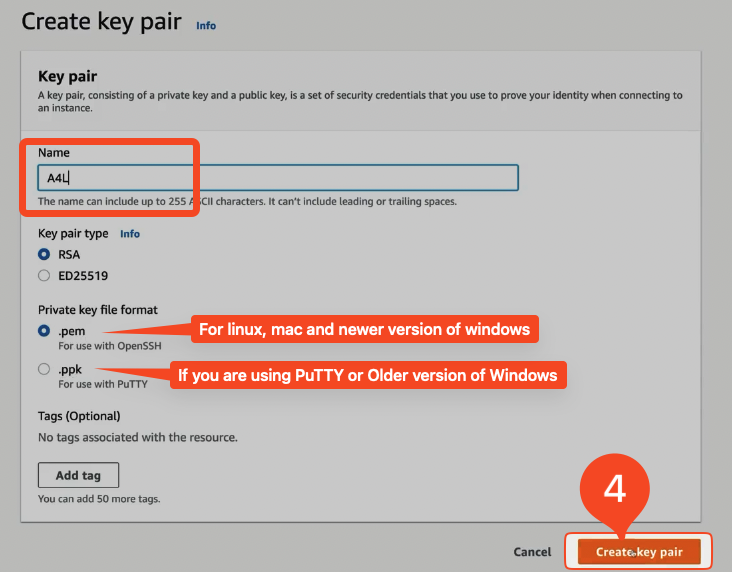
Step 3: Create a Key Pair
Step 4: Download and Save the Key Pair to Your Local Machine
💡 Download and Save the Key Pair in your Local Machine
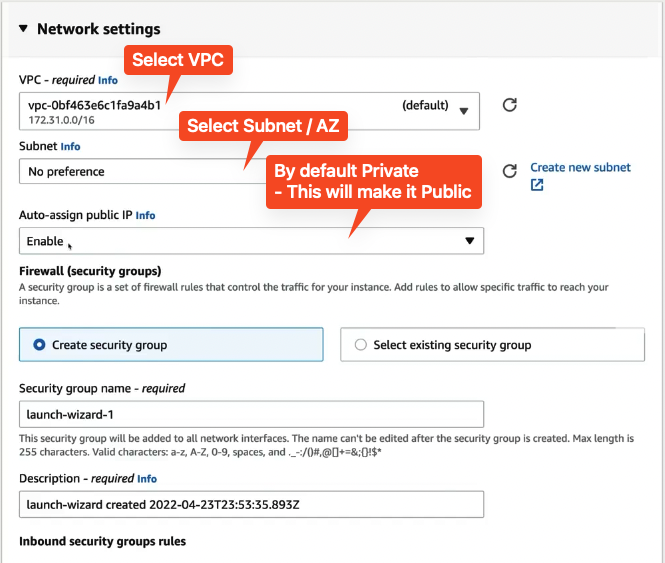
Step 5: Assign a Subnet or Let AWS Assign a Random Subnet
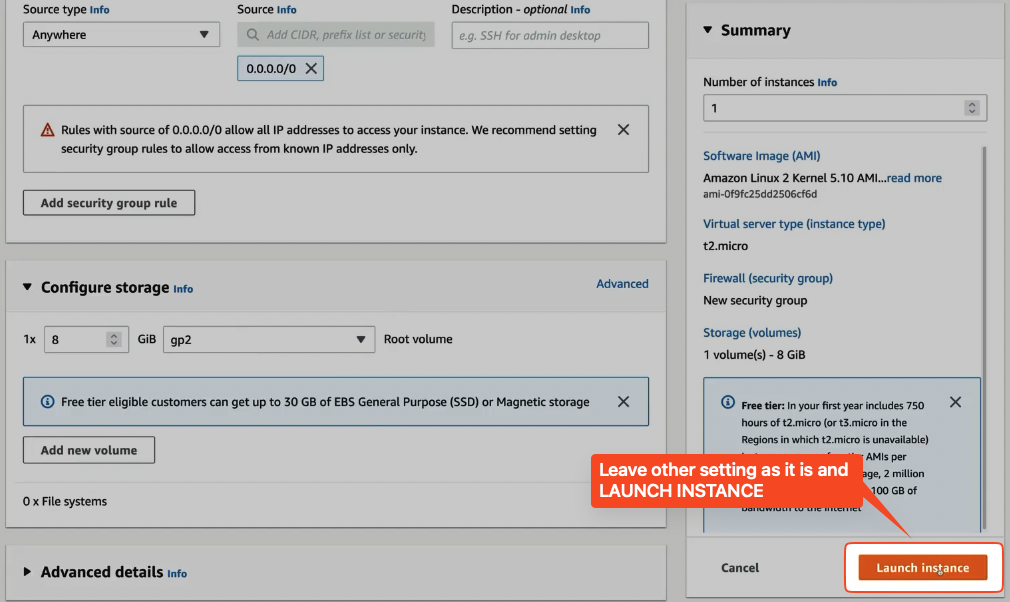
Step 6: Launch the Instance
💡 First, Instance State will be PENDING and it will change to RUNNING. During this time, Status Check is at --. Then, Status Check will change to INITIALIZING (when RUNNING). It will run some tests and when all tests PASSED → Proceed
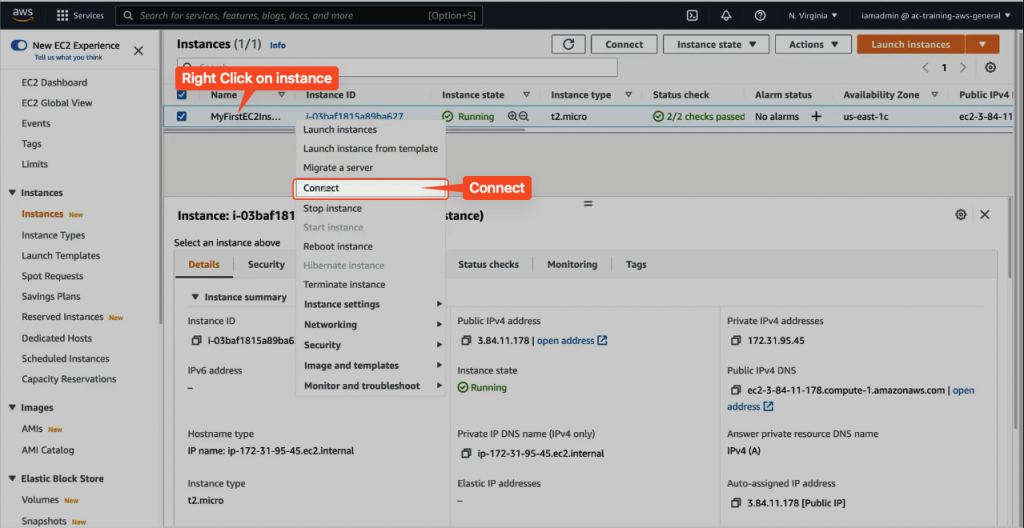
Step 7: Monitor Instance State
Step 8: Open Terminal and Navigate to Directory with Key
💡 Open Terminal
- Goto directory where
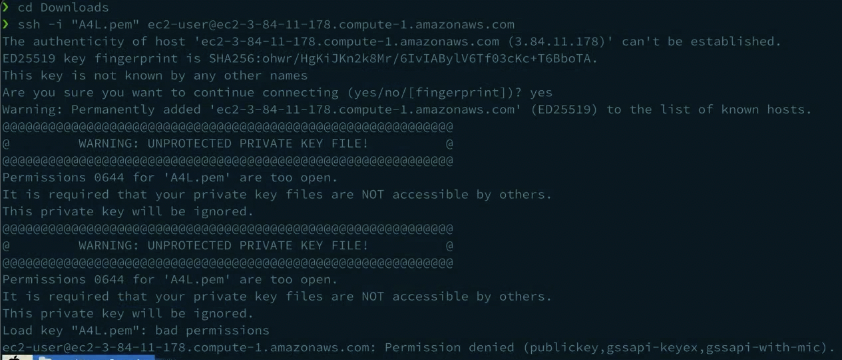
KEYis stored(A4L.pem) - If we directly run the last command (as in Example) → ERROR
As the key is **publicly accessible**→ other users on my PC have access to the .pem file- FIX? →
managethepermissionsas in Step 3 - Step 3 is
not the same for **Windows**
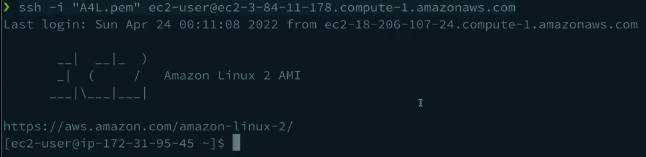
- It will now CONNECT
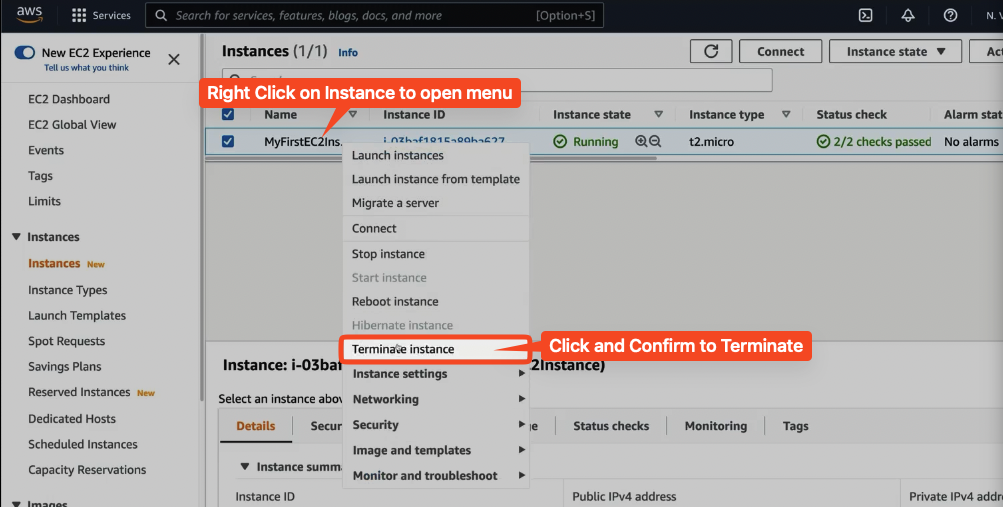
Step 9: Terminate the Instance
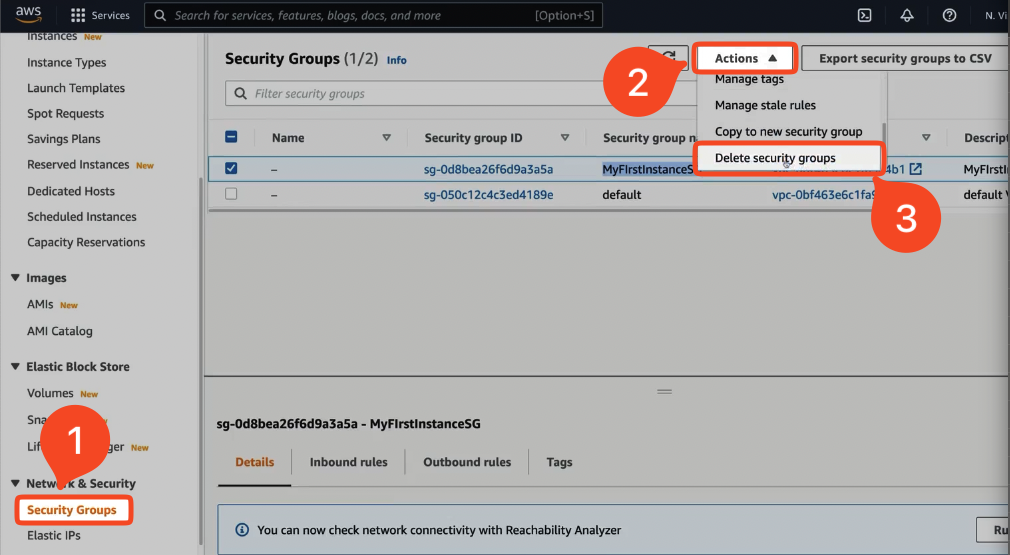
Step 10: Delete Security Group (after instance termination)
- Cannot be deleted until it is attached to any instance
- Let EC2 terminate and then Delete Security Group

Congratulations! You’ve successfully set up and managed an EC2 instance.
By following this guide, you’ll gain a solid understanding of how to work with EC2 instances, manage costs, and ensure efficient operation of your AWS resources. Stay tuned for more in-depth tutorials and insights on Full Stack Development and Cloud Technologies!

1 comment
Very insightful, thanks for posting!